I2C LCD Shield for Arduino – save wires!

The standard character-based display used on many Arduino projects are based on the Hitachi HD44780 chip.  They are available quite inexpensively, as little as $2.59 on eBay shipped from China for a 16×2 display.  Sizes go up to 20×4 (what I usually buy), and common modes include black on green, some with backlight, and white on blue, which requires a backlight.  These displays are supported by the native LiquidCrystal library built into the Arduino LCD.  Using these displays requires, at a minimum, 6 data pins, on the Arduino.  That can eat up a lot of data pins if you are using other items.

I2C to the rescue!  I2C is a 2-wire serial communication protocol also natively supported by the Arduino.  For a little extra money, you can purchase I2C displays with a “backpack” attached that reduce the display down to an addressable I2C device, and all is needed is a clock and data line attached to pins A4 and A5.  You can make your own with shift register.  You can also purchase the backpack separately.   Several exist, based on a variety of chips. The most common (and the subject of this post) are based on the PCF8574 (and variants PCF 8574A and 8574A) I2C shift register.

In theory, all you need to do is:

  1. Connect power, ground, and the two wires
  2. Identify the I2C address of your display
  3. You are up and running!

In practice, #2 and #3 are a time-consuming trade-off.  Identification of the I2C address is not hard — if not provided by the vendor, there are many Arduino sketches out there that will scan your I2C bus and identify the address of any device that responds — it has worked on the 3 I2C devices that I have.

The hard part, and the reason I am writing this blog post, is the frustrating aspect of finding the right library to use, and the correct pin configuration for your particular LCD backpack.

If you purchased your backpack from a vendor like Adafruit or Sparkfun, they have a library on their website.  And it will work, and they will help you (as well as the online community).    The downside of these libraries is that they make affect your use of non-I2C LCD displays.

If you purchased your I2C LCD display or backback from a cheap vendor on eBay or Amazon, you (like me) likely have no documentation.  Not only is the address unknown, but the exact configuration (what pins on the shift register are connected to the LCD display, issue with how the enable and backlight are configured, etc) varies from manufacturer to manufacturer.  To make it more complicated, there are MANY LCD I2C libraries out there, and they vary in terms of how much they give you controlto specify these pin configurations vs making assumptions.

I got to a point where my display was powered and visible to the I2C scanner, but various libraries I tried were not working.  I probed the pin connections and verified there were no bad solder joints, and I even bought a 2nd LCD I2C display to compare (different vendor) and had similar problems. I became convinced that the problem was getting the library to match the exact pin configuration between the 8574  chip on the backpack and the LCD display, and a few assumptions about other LCD pins.

I found a solution.  It works!

I highly recommend using this LCD library.  I like that it covers all possible displays and interfaces, but it also retains sufficient flexibility to change the pin configuration to work with your display. It is also well-documented and actively maintained. It replaces the native LiquidCrystal library in the Arduino IDE, but works fine with my non-I2C displays.  The only downside, at least on my Mac, is that by replacing a built-in library, it means any upgrade to the IDE means re-replacing the library.  Installation is a bit tricky, but this is true for most replacement Arduino libraries.

I also highly recommend reading this post.  This post identifies 3 common variants of the 8574 backpack, and how to configure the aforementioned library to work with each variant.  My two displays were of the #3 variety on that page, and that is what ultimately worked for me.

Once your backpack is working, I recommend you also read my blog post about using a potentiometer to control the backlight power.  The jumper on the backpack just turns the backlight on and off.  Putting a potentiometer between 5V and GND and using the wiper to control the display backlight can reduce current draw from 30 mA to as low as 4 mA with no loss of readability.

Ultimately, this is a tradeoff of time and money.  You can pay a lot less on eBay, Amazon, Alibaba, etc for a low-cost display, and devote some time to getting them to work (and you may learn something, too!)  Or you can buy something from a company like Adafruit or Sparkfun, use their provided libraries, and be up and running.  You will pay more, but it will work out of the box (you hope).  For me personally, I wanted a particular display configuration they did not sell, and I found their libraries more limiting (although they work with what they sell!) than several of the open-source libraries out there.

I am somewhat surprised, given the utility of I2C devices, that there is not a more consistent standard for I2C LCD displays (this would not be hard), enforced by built-in support to the Arduino IDE LiquidCrystal library.  At least, that is what I would do if I controlled the IDE development 🙂

These are really notes to myself, but I hope someone finds them useful.  For reference, here are links to the displays I actually purchased on eBay and Amazon.

eBay 20×4 LCD I2C display white-on-blue – $8.49 (including shipping)

Amazon 20×4 LCD I2C display white-on-blue – $5.49+$2.49 shipping

I particularly like the eBay vendor frentaly since they offer prices similar to those shipped from Asia, but are located in the US in an Atlanta suburb, so shipping is quite fast! (especially since I live in Atlanta).  Not a paid endorsement — I just like their prices and location due to fast shipping. I cannot speak to product quality beyond this display and another I2C backpack I have purchased.

Next up — I am trying to figure out how possible it may be to configure one of these I2C interace boards to work with an ADS9850.


Posted in Uncategorized | Tagged | Leave a comment

Arduino Class Sunday Dec 13

This is a reference post for the Intro Arduino class I am teaching as part of the Atlanta Radio Club’s 2nd Sunday Tech series.  More info on the series at http://secondsunday.tech.
Getting Started with the Arduino!

Low-cost user-friendly microcontrollers have changed the face of amateur radio! Many radios and DIY projects now are microcontroller based, and the relationship between hardware and software has radically changed.  This session will introduce users to the Arduino system and provide low-cost kits for getting started.  Capabilities of the Arduino will be demonstrated, and users will have a chance to get started.  A simple CW keyer application will be demonstrated using an Arduino and an optoisolator.  Others are invited to show up and demo their projects.

When: Sunday Dec 13, 2015

Where: Decatur Makers — located in the gym building behind the First Christian Church, Decatur, 605 W Ponce de Leon Ave

Questions: contact Rob Butera (rob@butera.org, KM4MK)

I have assembled kits for this class from bulk purchases.  Each kit contains the basics for getting started, plus a few components (optoisolator, audio) that may be helpful for simple ham projects (like a CW keyer).  Cost is $13 per kit (cash or e-payment, like PayPal). Email me for availability.

Each kit includes:

  • 1 push button switch
  • 2 10K resistors
  • 2 1K resistors
  • 1 10K potentiometer
  • 1 817C optoisolator
  • TRS socket for audio cable
  • 2 red LEDs
  • 1 small breadboard
  • 20 jumper wires with pins
  • Your choice of either:
    • Arduino UNO with  USB mini cable, 9V battery adapter w DC socket plug OR
    • the smaller (but similar) Arduino Nano with USB mini cable, 9V battery adapter with lead wires

What is the difference?  They differ in the form factor, the UNO is the most common Arduino and good with shields (expansion boards). The Nano (my favorite) is a lot smaller but ideal for finished projects. They have nearly identical functionality and the same microcontroller.

What you need to do before class if buying a kit

These Arduinos are Chinese clones that use the CH340 USB serial driver.

  1. Bring a laptop computer
  2. Install the USB-serial driver for the C340G chipset.  A lot of overseas sites (Chinese, Russian) have links to it.  Some have viruses. I have use this drivers from this site without a problem for over a year on my Mac (also Linux and Windows) http://www.5v.ru/ch340g.htm
  3. Install the Arduino software from http://www.arduino.cc for your computer (Windows, Mac, Linux)

Reference Material

http://www.arduino.cc is an excellent reference.  It contains an online reference guide to the language and programming environment, and explains each of the example sketchs (programs) built into the programming environment.

All the components in the kit provided are standard components used in most electronic projects.  The optoisolator (4 pin chip that says “817C”) is the one item you may not see in many Arduino tutorials — you can find a data sheet for it (and many other integrated circuits) at this web site: https://arduino-info.wikispaces.com/Popular-ICs

Adafruit (http://www.adafruit.com) and Sparkfun (http://www.sparkfun.com)  are two common online companies to buy components and kits for microcontroller-based projects (such as LCD displays).  These companies also often have tutorials on their website for each of these components.  eBay is another place to buy many of these components — asian manufacturers often sell and ship direct for much less money than US or European manufacturers, with the tradeoff of a longer shipping time and unknown documentation.

Post-Meeting Notes — followup info and ideas for the future

  • Some OSX users had trouble.  Seemed to be fixed by
  • Here is my sketch for a CW beacon/message sender.  (ZIP file) You can simply change the #defines for your desired words per minute and the outgoing text, and the program will loop and key the message at the interval specified in the code.  There are MANY fully featured CW keyers out there, such as this one.
  • Have an earlier start time (1 hour) for people who have not gotten the serial driver to work on their computer yet.  Send an email out on what they should see if it is properly installed.
  • Next year — makerspace will have a lot of fully functional computers — use those!
  • Component changes — better TRS audio adapter, pushbutton that is more breadboard friendly
  • Consider two classes, one on basic breadboard electronics, the second one then using it with the Arduino
Posted in Uncategorized | Leave a comment

Arduino + AD9850 DDS

I’ve been playing with connecting an Arduino to an AD9850 DDS waveform generator. This is a DDS chip from Analog Devices that is capable of outputting a sine or square wave at frequencies up to 40 MHz. There are two variants of the popular low-cost boards available (such as on eBay) that provide a plug-n-play implementation of this device.  While it is easy to find the documentation for the AD9850 chip itself, it is harder to find pinput/spec information about the board itself.

This post from NR8O’s website provides most of what I used to get up and running, including using his test code – I have the same device from eBay.  This library may be useful in the future, which is an Arduino library for controlling the AD9850/1 chips.

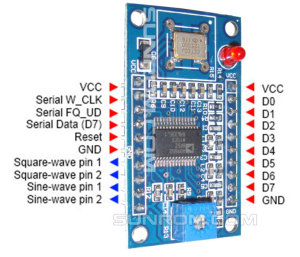
dds-pins

Here is one page with the pinout. A copy is shown above (in case it ever goes offline).  From online reading, I believe the difference between the two sine and square wave outputs is the presence of a low-pass filter.

So how accurate is is?  When running at 20 MHz, and looking at an auto-frequency calculation on my scope, every measure I pull up is within 10 Hz of the specified frequency, and usually less. This is not a statistical sampling, but suggests the DDS is pretty solid — a lot more drift would be visually noticeable on the scope.

It appears that SineWave1 is unfiltered, while SineWave2 is filtered. At lower frequencies (like 100 kHz), the Sinewave2 output was much cleaner (less spurious scope triggering), at higher frequencies, the waveform was clearly attenuated. In theory the output is a 1Vpp sine wave, with min/max voltages at 0V and 1V. Here is the output I obtain at different frequencies (these are not average values, but “eyeballed” from the instantaneous frequency measurement. My Digilent scope only samples at 100MHz, so there will be some error at these high frequencies). The DC value remained about 0.51V at all frequencies.

[table “” not found /]

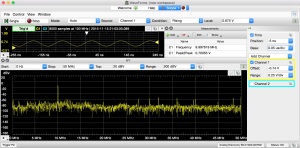
Further info on the output filter. At 1Mhz, Sin1 has its 1MHz peak at -10dBV, and the odd harmonics (not sure why just odd — crossover from the square wave generation?) have peaks at -50 dBV. The noise is at about -70 dBV. Meanwhile, Sin2 at 1 MHz has similar specs and a total lack of harmonics.

The square-wave output is 5Vpp in amplitude, and looks OK up to 1Mhz. It is harder to evaluate on my 100 MHz scope at higher frequencies (at 10 Mhz, that is only 10 samples/cycle) and there’s no cycle-triggered average feature.  The square wave has prominent odd harmonics (base at 3dBV, 3MHz peak at -2dBV or so, 5MHz peak at -3+ dBV and even harmonics at about -40 dBV.  For Square2 the even harmonics are not much more suppressed, but somewhat more at the 15+ MHz range.  The pot on the DDS board is used to adjust the square-wave duty cycle — there does not seen to be a “digital” way to do it.

This makes me suspect how clean of a source this DDS chip may be for RF applications, but we will give it a try since others have.

Important specs on this board for future applications – output sine wave is only ideally 1Vpp, and output is limited to 10.24 mA with the 3.9K value of Rset on the board (I suspect that several designs using this chip online for impedance measurements ignore this fact).

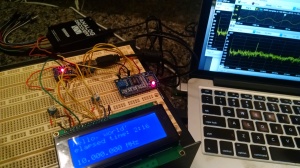
Below is a pic of the current setup with the Arduino Nano driving both an LCD display and the DDS9850 chip.  I am running out of pins, but still need more for both the analog measurements from the analog circuit and the rotary encoder for making selections.

UPDATE: I finally found board documentation here, and here is a locally stored copy in case the original vendor link disappears.

ddslcdscopeshot


Posted in Uncategorized | Tagged , | Leave a comment

20×4 LCD display tips — on an Arduino Nano

Using a blog for debugging notes so I can easily refer to it.

LCD displays are quite common for Arduino applications.  I have purchased a 20×4 white on blue backlit display.  Most LCD displays on Arduino are based on a Histachi HD44780U controller chip, and the displays themselves have a relatively standard 16 pin interface.  I am using a Chinese copy-cat Arduino Nano (ATMega 328), and it all works identical to the tutorial pinouts for a standard Arduino.

Things I have learned.

  • The LiquidCrystal library (built in to the default environment) will likely handle all interface needs.
  • Most examples use a pot between 5V and GND to provide a contrast control voltage, and a resistor from Bklt+ to 5V to fix the backlight.  Examples online vary on what these values should be.  Most say to use a 10K pot for the contrast — the datasheet suggests 50K to 100K, and heck, it will draw less power.  I found a 100K pot works just as well as a  with a 10K pot, and find the output voltage needs to be turned nearly all the way down to display the text.  0.7V output is barely visible, comfortable values are 0.4V to 0.3V (lower voltage is higher contrast).
  • I still had trouble controlling the display backlight.  The datasheet says to NOT connect directly to 5V (even though the Adafruit tutorial does so) — it may hurt the display, and it certainly may be a power hog! I connected another pot (22K, it is what I had) configured as a variable resistor, between Bklt+ and 5V.  This provided excellent control of the backlight — the readable settings varied from 1.7K (barely visible) to near 0K (very bright) for this resistor.  A downside of a white on blue display is the constant power to see the text — I think I would like a passive display with backlight next time.  This pot is extremely sensitive — I think a 2K-5K pot would be ideal in the future, or use a 10 turn pot if you have something larger.
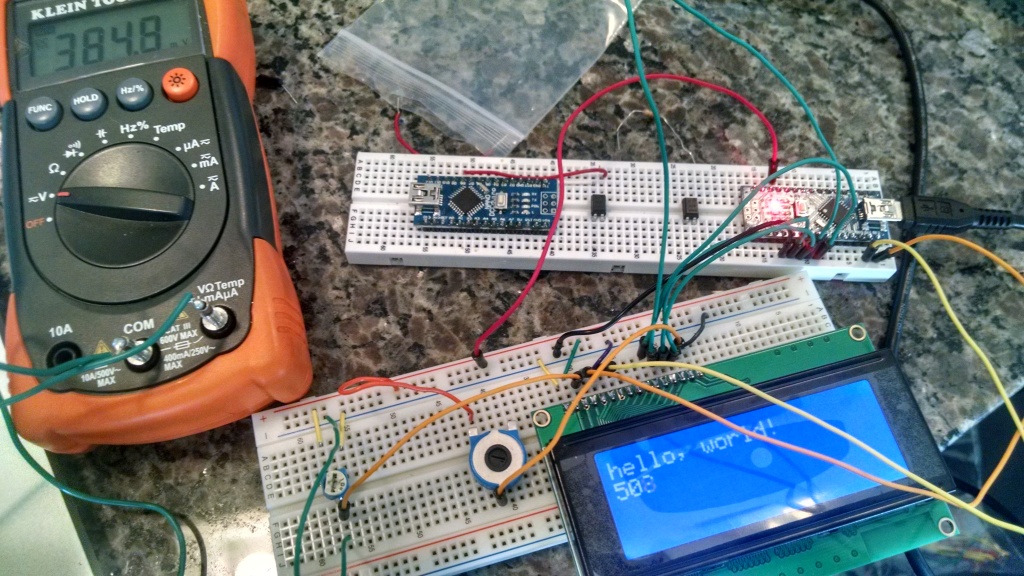
  • I measured power consumption to the breadboard with the LCD display as I varied backlight settings.  Super-crazy bright was 30 mA, while very readable and still quite bright was 4 mA.  What a huge difference in consumption!  A barely readable backlight was 2 mA of consumption. The contrast control has a minimal effect on power consumption.  This likely explains why the datasheet says not to connect to 5V — there is visibly little readable difference between 4 mA and 30 mA.
  • These displays require 4 or 8 data lines, as well as the serial (I2C) interface.  It is possible to purchase variants of this display with a “backpack” chip set (soldered onto pads that already exist on the PCB in the back) that make it a true I2C device, with no data lines required.  Other sites online have rolled their own using a 74595 shift register and a transistor.  I need to keep this in mind since this is my first learning step in a project that requires both an LCD display as well as an I2C controlled DDS chip, and pins will be used quickly.
  • I also do not know if the LiquidCrystal library is using the built-in Arduino I2C hardware or implementing the I2C/serial in software.  In a perfect world I’d like both the DDS chip and display running off the same I2C bus to save pins.  But I can tackle this on a future day.
  • This is one of many steps in building an antenna analyzer … stay tuned (pun intended!)

2015-08-23 12.21.06

Posted in Uncategorized | Tagged , | Leave a comment

Standing Peachtree

Over a year ago the City of Atlanta City Council passed motion to open a park along the Chattahoochee at the site of the Atlanta water intake facility, by the Hooch Wave.

Every year someone asks about the Hooch Wave and how to get to it.  It was formed by a weir on the Chattahoochee just below the Atlanta water intake. Weirs make an ideal wave, as you can see by this photo from AW. I last visited the wave one morning in November 2010 with Rick Thomspon, and it looked a lot like this picture.

AW photo of Hooch Wave Surf at moderate flows

Accessing the wave is tedious, as one must park in a sketchy area and hike through a lot of muck. Jim Wade, an internationally competitive kayaker who also happens to be a PhD student at Georgia Tech, had told me that the island on river right of the wave had washed out a few years ago and that the waterworks had totally remade the area.   Once the park was open, it was on my bucket list to check out the park and see how the wave has changed. Nobody has posted any info on the AW website since May 2012.  And changed it has.

Standing Peachtree Park is entered via the same entrance as the Atlanta water intake.  Enter off of Ridgewood Rd.  The sign says it is open 8am to 8pm.  But how to get to the river is not obvious.  The captions in my photos chronicle how to find the river (it is not obvious), but here is a summary of what I found:

  • The park is open 8am to 8pm.  River access is via the second gate after the parking (you have to walk) and veer left down the grassy hill.
  • It took me 8-10 minutes carrying my boat to get to the river.
  • At the river, there is an 8-10 foot bank to get down.  Easy down, harder up, would be harder with a canoe.  Climbing out, it kind of reminded me of the Locust Fork takeout, but only half as bad.
  • This would be an ideal access point for paddling the Metro Hooch down a bit further.  If you don’t mind carrying your boat a bit!
  • River level was 1050 cfs.
  • The wave is no longer a wave. More like a drop.  With not much water. The reconstruction of the island and the weir has led to something that  is not a weir anymore.  It is a pile of rocks, more like Rock Jumble on the Chattooga or the busted dam at the Tuck putin.
  • Nothing was surfable to me. At least in a playful way.  Maybe a spud boat could do something in there, but my Dagger Juice could not.
  • At higher flows, this could become an epic hole.
  • The ledges on the river-right (Cobb) side of the island are low flow at nominal flows.  However, I would like to come back at 2000 cfs or higher.  There seemed to be several spots with potential.  One could sink my bow, but the water was shallow enough that I could not get any pop out of it.
  • The river wide surf wave, apparently formed by the sewage treatment outflow pipe that extends across the river, is really glassy.  All the outflow appeared to be below the surface on river left.

I saw a lot of wildlife. The usual hooch creatures: turtles (many, and huge), muskrats, herons.  Also two adult deer!

Based on some Facebook comments to this post (thanks!), I want to add something else.  The city signage implies this is an access point for boating.  The current drop by the waterworks is not exactly navigable for the typical river user.  A whitewater boater could run it, but it really is now just water down a big pile of rocks.  The older weir-type design channeled the water into a clear smooth drop.  This both formed the wave but also made the drop runnable by regular or irregular recreational boaters.  The city should be approached about modifying the drop to make it more easily navigable  — removing a few rocks in the middle to create a channel (and a wave!) is an obvious solution.

Posted in Uncategorized | Tagged , | 2 Comments

My extremely biased review of the Decatur Craft Beer Festival

I live in a condo in downtown Decatur.  I love beer.  I am a beer nerd, not a beer snob.  There is a difference — each to their own.  I will admit then when faced with a lame InBev lager beer selection at a restaurant, I will just choose a Bud Light Lime-A-Rita instead (which really isn’t a beer).

So people just assume I go to the Decatur Beer Festival (DBF) each year.  Or any beer festival.  Reality — I have never been been to a beer fest.  I HATE crowds.  To be Decatur specific, I’ve seen large drunken crowds at the beer fest – why should I pay $40 when I can walk to one of 20 or so local bars whenever I want?  I know when the $3 happy hour are, and most of the good bars will give me 1 oz. samples anyway.

So I went this year.  DBF was offering $100 VIP tickets.  What does that get you?  1) unique portapotties 2) food and 3) tastings of harder to find limited release beers.

I went today.  My thoughts?

1) Is VIP worth it?  Yes and no.  There were about 20 or so beers in the VIP area.  Most were limited releases.  Too many were bourbon barrel aged – craft brewers – stop it!  It’s an overused fad by now.  I thought it would have died last year. Even one of my favorites – Terrapin’s Wake-n-Bake Stout – fell prey to the bourbon barrel temptation. I don’t like bourbon. Can you tell?  The VIP selection was heavily local, and a good set of beers.

Almost no beer reps were at the VIP area (at most booths, there exists a rep or two besides the pouring volunteers).  Who buys VIP tickets? The volunteers are not usually knowledgeable about the beers that they pour. I think the VIP crowd would appreciate

The VIP only bathrooms weren’t necessary  – while I was there (11-2), there were plenty of rest rooms in and out of the VIP area not being used.  UPDATE: By 3-4pm, they were necessary.

I hate crowds.  Have I said that?  The VIP area was a nice wide open area to get away from the crowds.  Lots of seating, and also good food provided by Oakhurst Market:  Ban Mi’s, wings, spiced peanuts, and lime popcorn.

VIP peeps get in at 11am, as compared to noon.  In hindsight, this was awesome (see below).  For me that hour made a huge difference.

In summary, the VIP area provided decent and ample food, space to chill out, distinct rest rooms that really were not needed, and a lot of unique (heavily but not totally local) limited releases to try.  I expected more in terms of the selection of limited-release beers.

Would I buy it again?  See my summary at the end of this article.

2) The Beer festival as a whole.  It was great until 130-2pm. I loved getting in at 11am (though many booths were not setup until 1130 or later).  Until then, no line for a pour was longer than 5 minutes.  Then the crowds started packing in.  I was somewhat disappointed with some of the larger craft breweries there.  Lots of their usual fare — nothing exciting, nor experimental, nor side projects.  I can buy that stuff anytime.  I guess this is to be expected – these festivals are trying to convert the interested masses, not existing beer snobs.  Kudos to two of my favorite west coast breweries — Lagunitas and Stone – for bringing interesting newer stuff to try.

3) Georgia represent!  The thing that made me the most excited was the phenomenal representation by Georgia breweries. The number has exploded in the past few years, to the extent that I can’t keep track of them all.  Also, the Georgia (and nearby SC) breweries were a lot more willing to experiment and push novel beers on the masses.  They were all pushing gabeerjobs.com, an organization dedicated to changing the 19th century blue-law era laws in Georgia that hamper the growth of small brewers.  In my favorites list below, many Georgia breweries feature prominently.

4) My favorites.  I am a beer nerd, and I am biased.  So here are my biases — take that into account!  I don’t like bourbon-barrel aged anything.  I think hops are over-rated, and I don’t like most strong IPAs.  I do like strong ales, and complex balanced beers like Belgian triples and quads, as well as stouts and porters.  I love sours, if balanced. I like a malty beer over a hoppy one.  I’m not anti-hop (I like Terrapin Rye, for example), I just don’t like it to dominate.  My favorites surprised me — nearly all from Georgia. And many were lighter than the kind of beer I usually like.  I put at * after those that were in the VIP area.

  • Orpheous Sycophantes*.  It’s a fig sour.  Not a full-on sour, but definitely a sour, with some complexy and fruity flavors.  Orpheus is one to watch out for.
  • Brass Monkey Nuts* by Yes Face beer.  An Atlanta brewery I had not heard of. A great british style nut brown, brewed with hazelnuts.  A cask. It works well.  When I walk back later today, I need to find their stout in the general admission area.
  • Second Self Thai Wheat.  For me, wheat beers are the lagers of craft beer. They work on a hot day, and quench thirst.  I don’t seek them out, but will drink one. This does more.  I love ginger.  This is a wheat beer with lemongrass and ginger. All the flavors are there, complementary, and well blended.  I could drink this all day.  Second Self is a relatively new Atlanta brewery – I had not even heard of them until I went out to Pint-n-Plate with some students from my lab just a few days ago.
  • Creature Comforts Cucumber and Lime Tritonia.  Like the Thai Wheat above, my instinct was not to like this.  But I love sours. And this is one. And the subtle hints of cukes and lime work well with a sour.  I had never heard of this Athens-based brewery, and all their beers were creative and intriguing.  I look forward to more.
  • Cherry Street Brewing Co-op Chief Sawnee’s Stash Coconut Porter. The name sounded like a gimmick (there are a lot of flavor-added porters I don’t like), but I tried it and loved it.  A porter with subtle flavors of coconut, dates, and vanilla.  Barely tasted any, but they were there and it made the porter really drinkable.  This Cumming, GA based brewery is really a brew pub selling at Rick Tanner’s Grille and Bar in Cumming, GA. All their beers were creative.
  • McKenzie’s Seasonal Reserve Hard Cider.  A few cider breweries were present – Woodchuck, Crispin. This cider, from Buffalo, NY, had a spiciness that made cider a lot more interesting to me.

So — would I buy VIP next year?  Maybe.  I think my first choice would be to volunteer!  I live a 5 minute walk away.  In earlier years, one had to earn volunteer points for the privilege of volunteering at the Decatur Beer fest. From talking with a co-worker who was pouring beer at one of the tents, this has all changed. They need over 500 volunteers now. It sounds like becoming a volunteer is not hard nor a privilege anymore (and some of them need pouring lessons!)  I would volunteer a late afternoon shift if I could have 11 (or 12) until 2 to drink.  Otherwise, I’d buy the VIP again.  I am on the fence on whether or not the special VIP beers by themselves are worth it (DBF – step up the game next year — did you notice the VIP tix did not sell out?) but the quality food, the open space for crowd-haters like me, and the fact that the dollars go to local organizations that benefit my immediate family, make this an option I would consider again. UPDATE: and see John’s comment about where the VIP dollars go.

It’s 330pm.  I’m going to walk back at 4pm and see what I think of the crowds.  And I need to find YesBeer’s tent in the open area. UPDATE: way too crowded. Waiting in line for 10-15 minutes for 2 oz of beer I can try anyway on another day. Next year, I’m going to volunteer 2-5 and drink beforehand …

Finally, I had many other good beers I’m not mentioning. These were my favorites based on my criteria of “if I really liked it I snapped a photo”

Overall, other than the crowds, a fun, well-run time.  Even when it got too crowded for me, it was not a crazy, misbehaving crowd.  Just, well, a dense crowd!


Posted in Uncategorized | 2 Comments

Head to Head Catan

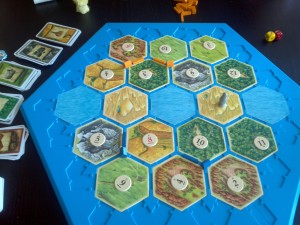
2014-02-08 14.12.21During the last “snow week”, Chloe was sitting at the kitchen table playing with the resource hex tiles from the game Settlers of Catan.  “What are you doing?” She replied that she was trying to design a head-to-head kind of 2 player variant of Settlers of Catan.

We talked about what we were trying to achieve – a variant that pits players head to head, with equal ability to acquire resources at the start, and promotes conflict and strategy between the two players.  We have tried another 2 player Catan variant, but we wanted something designed not by tweaking Catan rules for two players, but for head-to-head conflict with a balanced start.

HeadToHeadCatan (PDF file) describes our first effort with this head to head version.  Try it! Send us comments.  The photo above shows how the board might look as the game is about to start.

Some game design notes from play testing.

  • The requirement that a player can have 2 resources with 2 hexes each is balanced by the 5 pip rule.  This makes player setup strategy more interesting. We initially tried a 4 pip constraint, but 5 offers a bit more flexibility while still constraining the 2-tile options.
  • We tried a set up phase where players take turns placing tiles and numbers – it was kind of plodding.  We found that allowing each player to setup as they please, and then move tiles/numbers around after seeing the other player, was more efficient. When both players agree with placement, game play can start.
  • We have not messed with the Development Cards.  However, we have thought about removing all the Victory Point cards, or reducing their number.
  • The game play offers a range of strategies.  Spending too much effort on defense can hinder scoring down the road.   We’ve tried to play games where we intentionally sought “disruptive” strategies that would mess the rules up, and so far it seems pretty balanced.  But we have only played 5 or so games so far …
  • We added the “friendly robber” rule (often used in online play) – it helps to prevent one player from getting way behind at the start.
  • The idea of giving one player the 6 and the other player the 8 was intentional, and works well.
  • So far in play testing, the ports rule is not helping much – they often do not come into play until a player is at 6-8 points, at which point they are commanding enough resources per round to likely not need it.  Other options we have considered include maybe allowing each player to choose a 2:1 and 3:1 port, and place them on the opposite player’s side of the board after game setup is complete, or some similar variant.
  • We tried various desert locations, as well as one desert vs two.  This combination seems to work best so far in balancing opportunity with risk.
  • The 3 settlement/cities rule on your side was not just to promote interactions, but balance as well. It is possible to hole up on your side and win, but there are consequences for doing so.


Posted in Uncategorized | Leave a comment

Noontootla Creek

This article was originally posted in the Georgia Canoe Association Eddyline.  It is a writeup of a trip taken by Todd McGinnis and I on 12 January, 2014.

Noontootla Creek – the creek less paddled

Noontootla Creek is a trout fishing tributary to the Toccoa. it is roadside along FS58. I have been eyeing this for years — my family has gone on many hikes in this area — it looks like a blast, and Will Reeves wrote up brief description of his trip in the 1990s which you can find if you search the GCA website. The Toccoa had peaked at 2400 cfs at 5pm January 11, and was holding steady at 1200 cfs when Todd McGinnis met me at the Toccoa the morning of January 12. Since it was just the two of us, I said “want to scout/try something new?” I had not heard of anyone paddling Noontootla (besides Will).

Short version: 1 hour of road scouting, almost 3 hours of river time to paddle 3 river miles, 9 portages (all due to deadfalls, not rapids).

We put in at campsite F and took at campsite B — these are among the several unimproved campsites along the forest service road. We could have put in even further up river, but this seemed like a safe distance given the time of day and expectations of deadfalls.

According to online data, we dropped 382 vertical feet in those 3 miles. It might be an overestimate, but looking at a USGS topo map with contour lines, it was certainly 300+. I have never paddled continual gradient like this.

Despite the portages, this is the most fun I’ve had on a river in a long time! I am not a creek boater, but now know why it is addictive. The upper stretches had numerous 3-7 foot drops and slides, some sketchy, lots of moves to be made – I found it thrilling! I now appreciate the value of a good boof, had two drops (one sideways, one backwards) with some hold time at the bottom of said drops, but still wound up with a dry hair day. I don’t usually paddle stuff like this, but it was a blast!

This was more fun and technical than my day on the Upper Upper Hooch a few years ago. This is a solid class III run in the upper reaches – complex rapids, and a few spots with must-make moves. Todd thinks some require class IV skills (see his comments below). We saw the weirdest undercut rock I have ever seen (water swirled around the top and flowed back towards upstream, over the undercut).

At this point, I will insert comments from Todd McGinnis. I will note that I think Will Reeve’s Eddyline article from the early 90s paddled only one mile of river, and likely the more downstream section of what we paddled.

Advice for anyone else considering doing this run:

1) Level – our water was getting low by the end. Don’t go just by what I stated the Toccoa was running at – I think what is more important is how high the Toccoa got the day before, which is a measure of how hard hit the area was with rain. It likely helped that the ground up there is pretty soaked and holding a lot of water.

2) Be careful. Scout a lot. By road and boat. There were at least two spots that we saw by car that we would not have seen (or necessarily considered scouting) by boat. We marked these spots so we could note them when paddling. While we had 9 portages (6 were short “walk around the tree”, 3 were longer and had some bushwhacking), there many others where we had to scoot, duck, or choose a suboptimal line to get down.

3) Be nice to the trout fishermen. This is a very popular trout fishing creek. We saw quite a few while scouting, though none by the time we ran it. They were all nice to us, and we were nice to them.

Finally, some comments from Todd McGinnis, from his Facebook posts:

This was a great day. It was a tight run with a good number of portages. Will Reeves writes it up as a class II III creek run and while I do not deny there are definately some class IIs in there it is not a class II level creek. IF you want to run this you need to bring your Class III/ IV skils. Hard to compare as each run has its own characteristics and unique attributes (big word score). That said the drops are characteristic of the Upper Nanty but in some cases much tighter as you are making your approach in and setting yourself up in sections that may not be any wider than 10 feet. It is a gem of a run because it is hidden much like Fires Creek.

There was one section that had three blind turns and at one of them we heard something so we decided to get out and take a walk to see what the noise was all about. We found the source of the noise. The water was pushing through a narrow section over about an 8′ drop. The river right side was a slide right into little low head but could be easliy punched. The only issue was if you messed up you would either be surfed right into a strainer and your exit river left was a pile of rocks. So the middle line had a good flow but you would have to boof right between two butt-cracking rocks (not Shiva friendly) but it looked doable. As we left to get back in the boats we noticed a nice clean left line that missed all that other junk and had a nice out flow. That was to be our line! Well back in the boats we go. As I make my way to the rapid I notice that the far left line is not there – it does not exist from the top – so plan “B” . I yell to Rob there is no left line — middle boof. I take the boof and grab a small bit of the ass cracker but still nice landing into an eddy to wait for Rob. Rob heard me and threw down a sweet boof.


Posted in Uncategorized | Tagged , | Leave a comment

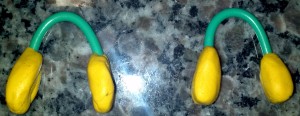
Whitewater Nose Clips

Winter means more pool roll practices.  I need nose clips for chlorine pools!

Why make your own nose clips?  They only cost $8 each.

  • Because you can
  • Because you don’t like paying $8
  • (Me) Because you seem to need/lose a pair and a whitewater shop isn’t convenient/quick enough

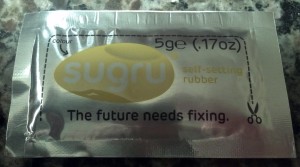
You can find quite a few “recipes” on the net.  Quite a few use copper wire and glue small squares of minicell or foam or rubber (or a combination).  I think I have seen at least one method online that uses Sugru (at least I know I got this idea from someone else – not my original concept!)  That is what I am showing here – they use copper wire and a self-curing rubber called Sugru.  The Sugru cures harder than minicell, but I think the end product is more durable.

Cost of these nose plugs is less than $1.50 each.  Biggest cost is a 5g package of Sugru, which has enough for 2 pairs.  An 8 pack cost about $20 or so with shipping.

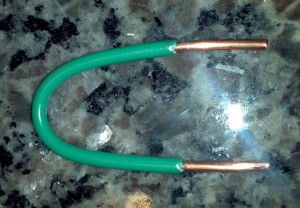
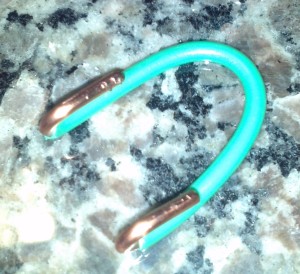
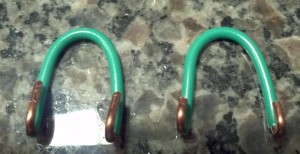
Instructions don’t require words.  Just look at the pictures. You need:

  • Tool(s) for cutting and bending and stripping copper wire
  • 12 gauge (some use 14, I prefer the more rigid 12) wire
  • a 5g package of sugru

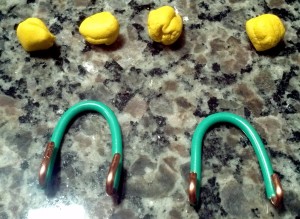
Cut wire to size (I use 12 gauge, some like 14 gauge).  Strip ends and bend.  Use trial and error to fit your nose – the bent loops should be positioned where most confortable.  Wire is cheap, so play with it!

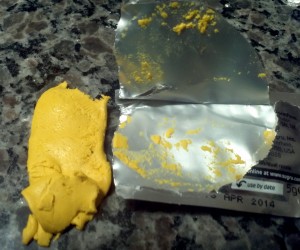
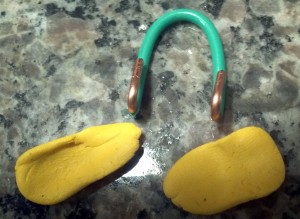
Open Sugru, separate into 4 pieces, flatten each and wrap around bent end of wire, mold with fingers.   Working time is 30 minutes, curing time is 24 hours.  Finish product (the sugru) is hard with a slight bit of flex – enough that my nose doesn’t mind!

2013-12-21 18.20.53 2013-12-21 18.21.43 2013-12-21 18.24.07 2013-12-21 18.25.02 2013-12-21 18.26.37 2013-12-21 18.27.23 2013-12-21 18.27.47 2013-12-21 18.30.50

Posted in Uncategorized | Tagged , | Leave a comment

1993 Eurovan MV Weekender “pop top” SOLD

SOLD in April 2014.  Left posted here for nostalgic purposes …

1993 VW Eurovan MV Weekender. 156K+ miles.  Silver/gray with white pop top.

We are selling Evie, our 1993 Eurovan.  She was purchased in February 2011 with 123K miles.  The previously owner said Evie spent much of her life on the west coast, and was brought to the east coast after acquired from a family member. No rust. Evie has carried our family of 4 on several amazing road trips, including a 9000 mile trip out west. We have been with her from coastal California campgrounds to the Cape Cod seashore, and from Wyoming and the Dakotas south to Texas.  She has the wear and tear of a van her age, but is in good condition and we have attentively maintained her. Nearly all service has been performed at Karma VW Repair.  She is garaged at our home in Decatur, Georgia, a few miles east of downtown Atlanta.

This ad is long, but is intended to be as complete and honest description as possible since many who may be interested may be looking from a long distance.

Features and Specs.

This is the Weekender model – not the full camper with the heater/stove/sink, but the more open model that is roomier and more flexible (and some say, harder to find). Two rear facing seats behind the front seats, and the seat behind the front passenger seat is removable. Rear, forward facing, bench seat. Pop out table between the bench and the drivers side rear facing seat. 12V cooler under the drivers side rear facing seat. The bench folds flat for ample interior sleeping room, and of course there is the pop top!  When the pop top is up, it is also possible to lift the ceiling to provide standing room (e.g., getting changed – see photos). There is storage behind the bench seat and ample storage (access from rear) beneath. We routinely stored sleeping bags, folding chairs, camp stove, and other camping necessities beneath the bench seat.  Folded flat, it can also haul a lot of cargo, both on the folded down seat as well as beneath.  Pullback curtains for all windows except the front door windows.  Very little wear or staining on the seats and cushions/pads, given its age.  Carpeting is clean, but does have spots/stains from camping through the years (update – just shampooed, appearance improved).  No excessive wear on carpet.  Floor mats (two large in the rear, plus two in the front) have helped protect the carpet. Poptop fabric has no holes/tears, all zippers work. There is a minor seam rip (more like a 1mm gap, not a tear) on the front fabric a few inches in length, backed by tape just to prevent it from becoming a tear.

A second 12V deep cycle battery under the drivers seat powers the interior lights, 12V cooler, and one 12V outlet I installed at the rear of the driver’s seat for easy power in the rear. In a pinch, you can even use the second battery to jump start the first (yes I have done it!).  AC and heat work fine – no AC issues beyond replacing the compressor last year. Electric windows/locks/ mirror controls. Cruise control. Automatic transmission. Mileage is 15 mpg city and 18-20 mpg highway.  Has always passed Georgia emissions, most recently in October 2013.  Title is clean and in possession. VIN:  WV2MC0700PH060372

Improvements.

  • JVC car stereo with removable face plate, USB and front aux inputs and rear aux input. Designed to work seamlessly with iPhone/iPod devices. There is a remote control for the radio (we have never used it). Rear auxiliary input is connected to a Pioneer INNO XM receiver cradle mounted where the ashtray used to be (no, I don’t have the ashtray). XM Antenna is mounted on hood. I will provide a used unactivated Pioneer INNO receiver if requested, otherwise the power/audio/antenna connections can likely be reconnected to a newer Sirius/XM device.
  • XM receiver cradle is mounted where the ashtray should be.  I do not have the original ashtray.
  • 2 gang electrical outlet in rear with pass-through plug on outside of van. This is not powered by the battery, but makes camping easier – power cord to outside of van – working electrical outlets inside.  This was installed by a previous owner.
  • 12V outlet installed at base of drivers seat and powered by aux battery. Makes rear access to 12V power a lot easier and provides a useful device charging port when the van is off.
  • I have modified the 12V cooler wiring to allow it to be powered by an external 110VAC power supply and installed a lighted switch to indicate if the cooler is powered by the battery or external supply.  Power supply is included.
  • 1.25 inch trailer hitch and electrical connector for trailer lighting.  We have never towed a trailer.  While I cannot used the trailer electrical connector, the LED indicators on the connector lights properly when brakes and turn signals are applied.
  • Home-made magnet-attached bug nets/doors to cover the side door and rear opening when camping. I fabricated these from a large bolt of mosquito netting and a large number of neomydium magnets.

Repair and maintenance history.

We spent almost $4000 in repairs when we first bought it – these were all deferred maintenance repairs expected at this age. For the years 2012 and 2013 repair and maintenance costs have averaged about $200/month. Oil has been changed regularly and we use synthetic oil. All repairs and nearly all local service has been performed at Karma VW. Karma uses OEM parts as much as possible.   All service receipts from Karma VW can be provided for the services below.

March/April 2011: Replaced ball joints. Replaced water pump. Replaced timing belt. Routine belts replaced. Driver side mirror reattached. Electrical fix for flakey gas/temperature cluster. New front brake pads and rotors. Replaced auxiliary battery with a new deep cycle battery. Alignment adjusted after repairs.

June 2011: new AC compressor (road trip repair – compressor pulley got loose, shredded belt. Aftermarket NAPA product)

July 2011: AC controls/electrical repair. Recharged AC after repair.

February 2012: New tires at 137K. Tires are rated for 80K miles.

May 2012: replaced interior dash frame, which was causing AC/heat controls to not work right.

August 2012: another new AC compressor. OEM this time!

October 2012: new distributor cap and rotor, spark plugs, ignition wires

April 2013: replace leaking coolant flange, vacuum line to ECM, leaking valve cover gasket, passenger side CV boot

May 2013: new primary battery (have receipt for pro-rated warranty), new alternator

October 2013: drivers side CV boot, replace seal around switch in transmission where transmission fluid was leaking.

Issues a future owner should be aware of.

  • There is a minor dent on the passenger side towards the rear. We never considered it worth repairing.  See photo.
  • The 12V cooler runs great when the engine is running, or under exterior power. When the engine is off and it is powered by the aux battery, it sometimes makes a clicking sound, which I believe is a relay in the cooler kicking in for a marginal voltage (the cooler has a cutoff switch to avoid draining the aux battery).  It also happens sometimes while running when a lot of accessories are turned on (like running the heat at high fan while blasting the stereo), so I think again it is a voltage-sensitive issue in the cooler itself.  We are very happy with how cold the cooler is.
  • Sometimes the temperature gauge runs high (3/4 instead of the normal 1/2).  This is associated with the coolant light flashing for a few minutes after the van starts, and then the temperature gauge will suddenly jump up from 1/2 to 3/4.  The coolant system is fine (temp OK, fluid levels OK). We suspect it is a minor electrical/gauge issue, and needs a simple electrical repair similar to what was done in March 2011.  We are waiting for the problem to become repeatable on a regular basis before taking it to the repair shop.
  • The engine runs fine – it is a 2.5L Audi inline 5 cylinder, used on 1993-1996 models of this van. Due to its age, one should expect leaks due to worn seals or old hoses. We fix them as they occur.
  • The van has aftermarket plastic hub caps. I can provide 3 of the original VW hubcaps if desired.
  • Older VW vans have cracked or worn interior trim work.  When we acquired the van, much of the trim was “sticky” (see online forums for discussion of this).  I have regularly applied 303 (a UV protectant, similar to Armor All) and eliminated the stickiness.  There are cracks at the tops of the A Pillars above the front doors, and along the top of the sliding door (see photos). No sign of cracks getting worse (these all existed when vehicle was acquired).
  • Two chips in windshield have been filled by glass repair shop

Price.  All reasonable offers entertained – the worst I can do is say no.  Kelly Blue Book value for this model in this condition was $13000 before it got too old last year to be listed 🙂 eBay auction prices range from $6K to $12K for this model and general year (I have tracked most auctions over the past year).  Email rob AT butera DOT org for more information.  Potential buyers can pay for an inspection prior to sale – I recommend Karma VW Repair just two miles away from us, even if they are where all my service was performed.  They are good, honest, and local.  Payment must be in wired funds to a US bank account.

Sale includes:

  • The van as described
  • Original owner’s manual, 12V cooler manual, stereo manual, documentation for connecting 12V cooler to 110VAC power
  • 110VAC to 13.8VDC power supply for powering cooler from 110VAC and associated connection wires
  • Custom-fit front window shade with black and reflective sides
  • Original tire jack, after-market cross-style lug wrench
  • tire repair kit, 12V-powered air compressor, spare tire mounted beneath
  • Emergency road flares, orange road-hazard triangles, jumper cables
  • 1.25″ Trailer hitch and electrical adapter for trailer
  • 3 spare (OEM) VW hubcaps (current hubcaps are aftermarket)
  • 4 stacking RV-style “leveling” blocks – place under tires to level vehicle on a gradient
  • VW Transporter T4 1990-95 Workshop manual Owner’s Edition (by Brookland Books)
  • optional: used not-activated Pioneer INNO2 XM receiver (fits provided cradle).  Even if you don’t take it, the electrical/audio/antenna wiring I installed can likely be connected to a new Sirius/XM receiver.
  • the bicycle rack in the pictures is NOT included
Posted in Uncategorized | Leave a comment